STEP 1: Ok, so I chose the composition of my items for the still-life. Then I played with placement of the lighting. Then I printed out a monochrome image, framing the composition in my minds-eye. Finally, I drew a rough and faint outline of the composition with a charcoal pencil…

Step 2: Choosing a seven-colour pallet, of complementary colours… All to contrast dark and light.
Black & White (mandated by the challenger/teacher)
Pthalo Blue & Lemon Cadmium Yellow
Alzarin Crimson & Chrome Oxide Green
And for the oddball mid-tones… Raw Umber
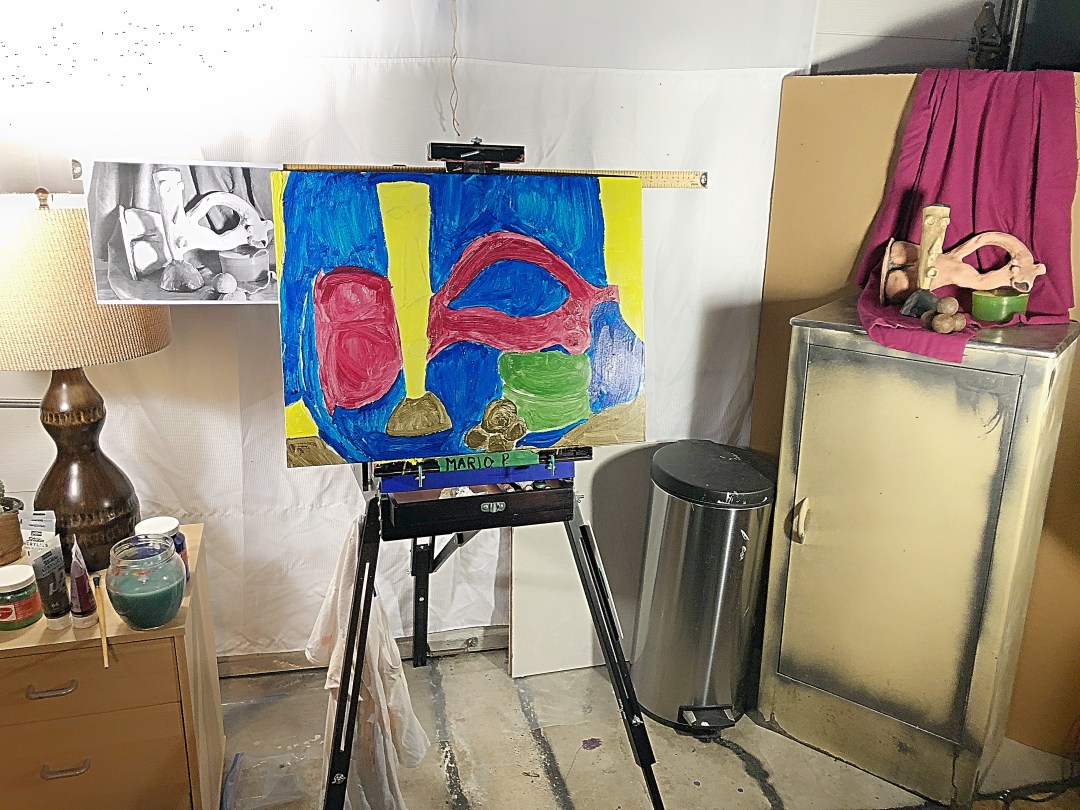
Step 3: Painting in the large colour areas and see how it feels…
I started with the smaller areas using the yellow and green, then the Raw Umber… once I saw the raw umber on the canvas, I felt sure it was the right mid-tone for this work and started to visualize how it would be used later on.
I made the decision to not-respect the colours of the model… I made the draping cloth blue, instead of red, so that I could contrast the central sculpture in the opposing red. With the yellow standing in front of it for a three way contrasting tension.
This feels like the easy part… now the real work begins: molding, shading, adding volume, highlighting, etc…
More to come soon, so stay tuned…
Discover more from The New Renaissance Mindset
Subscribe to get the latest posts sent to your email.

One thought on “(Home) – Studio Painting – 4th Still-life Project: A Seven-Colour Challenge – First Steps”